Detection
Face detection is the first step in any face analysis pipeline. UniFace provides six detection models.
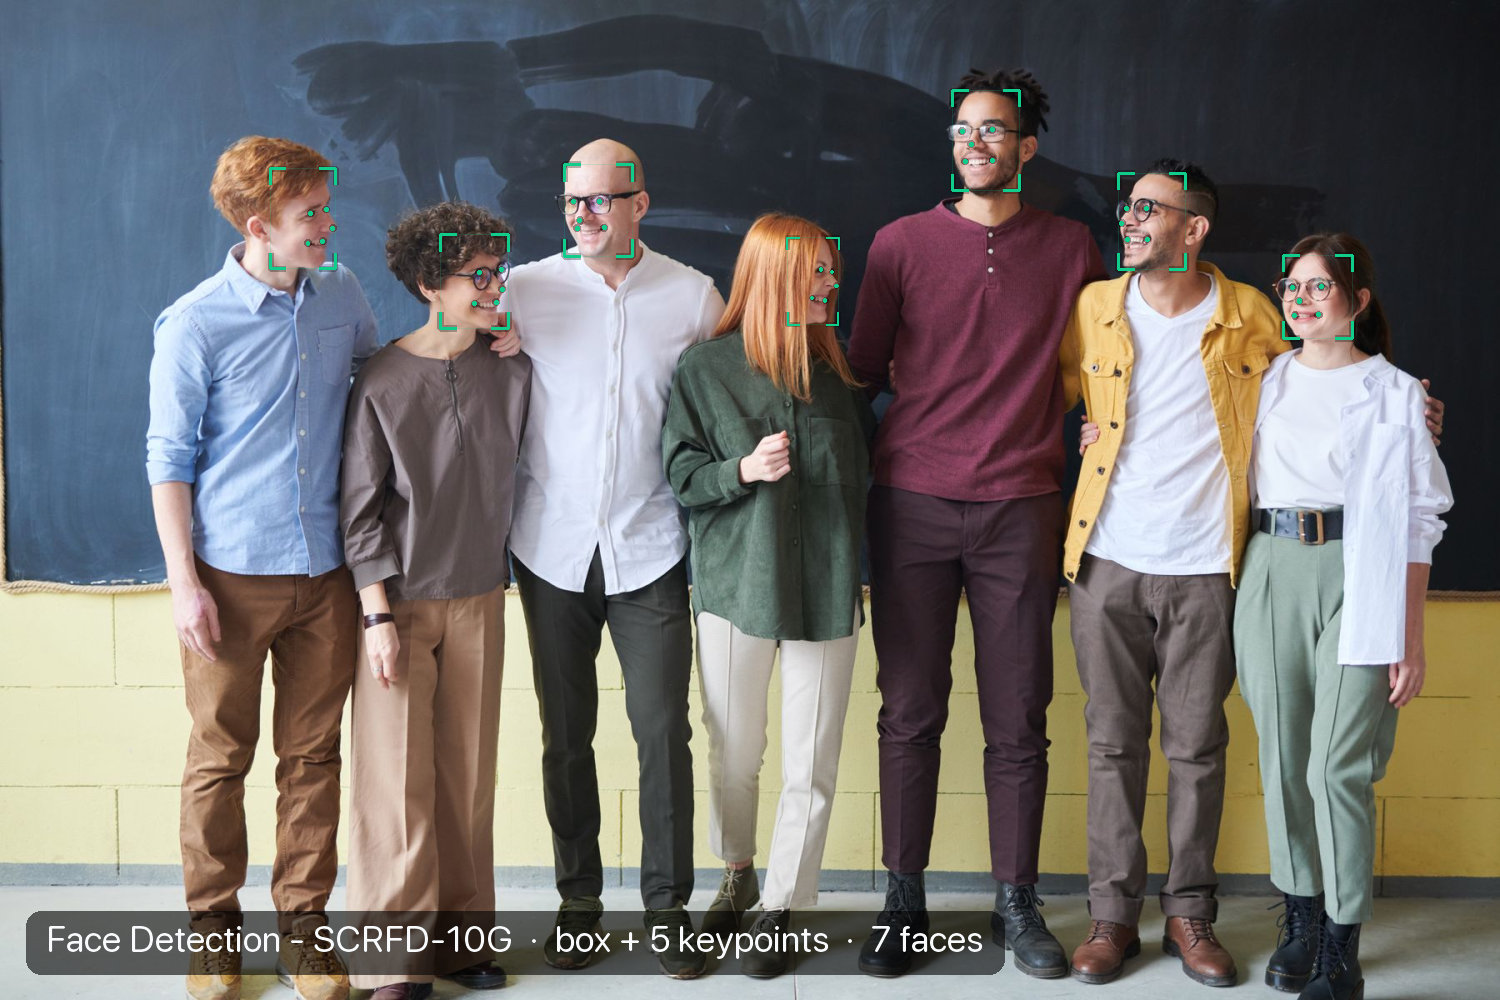
Available Models
| Model | Backbone | Size | Easy | Medium | Hard | Landmarks |
|---|---|---|---|---|---|---|
| RetinaFace | MobileNet V2 | 3.5 MB | 91.7% | 91.0% | 86.6% | |
| SCRFD | SCRFD-10G | 17 MB | 95.2% | 93.9% | 83.1% | |
| CenterFace | MobileNet V2 | 7.0 MB | 92.2% | 91.1% | 78.2% | |
| YOLOv5-Face | YOLOv5s | 28 MB | 94.3% | 92.6% | 83.2% | |
| YOLOv8-Face | YOLOv8n | 12 MB | 94.6% | 92.3% | 79.6% | |
| BlazeFace | BlazeFace (short-range) | 0.5 MB | — | — | — | 6-point |
Dataset
All models except BlazeFace are trained on the WIDERFACE dataset and benchmarked against it. BlazeFace comes from Google MediaPipe and is not benchmarked on WIDERFACE.
BlazeFace landmarks are not alignment landmarks
Every other detector returns the 5-point alignment template — left eye, right eye, nose, left mouth corner, right mouth corner — which recognition, quality, and XSeg parsing all consume.
BlazeFace returns 6 MediaPipe keypoints whose fourth point is a mouth
center, not corners, so they cannot be fitted to that template. It leaves
supports_alignment = False, and FaceAnalyzer disables recognition
with a warning rather than producing broken embeddings.
detector.supports_alignment  # False for BlazeFace, True for every other detector
detector.supports_landmarks  # True for every built-in detector
supports_landmarks answers the earlier question: does the detector fill
Face.landmarks at all? Every built-in detector does. Both flags are opt-in on
BaseDetector, so a custom boxes-only detector reports False for both without
declaring anything — see Custom Models.
RetinaFace
Single-shot face detector with multi-scale feature pyramid.
Basic Usage
from uniface.detection import RetinaFace

detector = RetinaFace()
faces = detector.detect(image)

for face in faces:
    print(f"Confidence: {face.confidence:.2f}")
    print(f"BBox: {face.bbox}")
    print(f"Landmarks: {face.landmarks.shape}")  # (5, 2)
Model Variants
from uniface.detection import RetinaFace
from uniface.constants import RetinaFaceWeights

# Lightweight (mobile/edge)
detector = RetinaFace(model_name=RetinaFaceWeights.MNET_025)

# Balanced (default)
detector = RetinaFace(model_name=RetinaFaceWeights.MNET_V2)

# High accuracy
detector = RetinaFace(model_name=RetinaFaceWeights.RESNET34)
| Variant | Params | Size | Easy | Medium | Hard |
|---|---|---|---|---|---|
| MNET_025 | 0.4M | 1.7 MB | 88.5% | 87.0% | 80.6% |
| MNET_050 | 1.0M | 2.6 MB | 89.4% | 88.0% | 82.4% |
| MNET_V1 | 3.5M | 3.8 MB | 90.6% | 89.1% | 84.1% |
| MNET_V2 | 3.2M | 3.5 MB | 91.7% | 91.0% | 86.6% |
| RESNET18 | 11.7M | 27 MB | 92.5% | 91.0% | 86.6% |
| RESNET34 | 24.8M | 56 MB | 94.2% | 93.1% | 88.9% |
| RESNET50 | 27.4M | 104 MB | 94.7%* | 93.7%* | 88.8%* |
* RESNET50 weights come from HivisionIDPhotos;
its scores are measured, not quoted from the paper. See Models.
Configuration
detector = RetinaFace(
    model_name=RetinaFaceWeights.MNET_V2,
    confidence_threshold=0.5,  # Min confidence
    nms_threshold=0.4,         # NMS IoU threshold
    input_size=(640, 640),     # Input resolution
    dynamic_size=False,        # Enable dynamic input size
    providers=None,            # Auto-detect, or ['CPUExecutionProvider']
)
SCRFD
State-of-the-art detection with excellent accuracy-speed tradeoff.
Basic Usage
Model Variants
from uniface.detection import SCRFD
from uniface.constants import SCRFDWeights

# Real-time (lightweight)
detector = SCRFD(model_name=SCRFDWeights.SCRFD_500M_KPS)

# High accuracy (default)
detector = SCRFD(model_name=SCRFDWeights.SCRFD_10G_KPS)
| Variant | Params | Size | Easy | Medium | Hard |
|---|---|---|---|---|---|
| SCRFD_500M_KPS | 0.6M | 2.5 MB | 90.6% | 88.1% | 68.5% |
| SCRFD_10G_KPS | 4.2M | 17 MB | 95.2% | 93.9% | 83.1% |
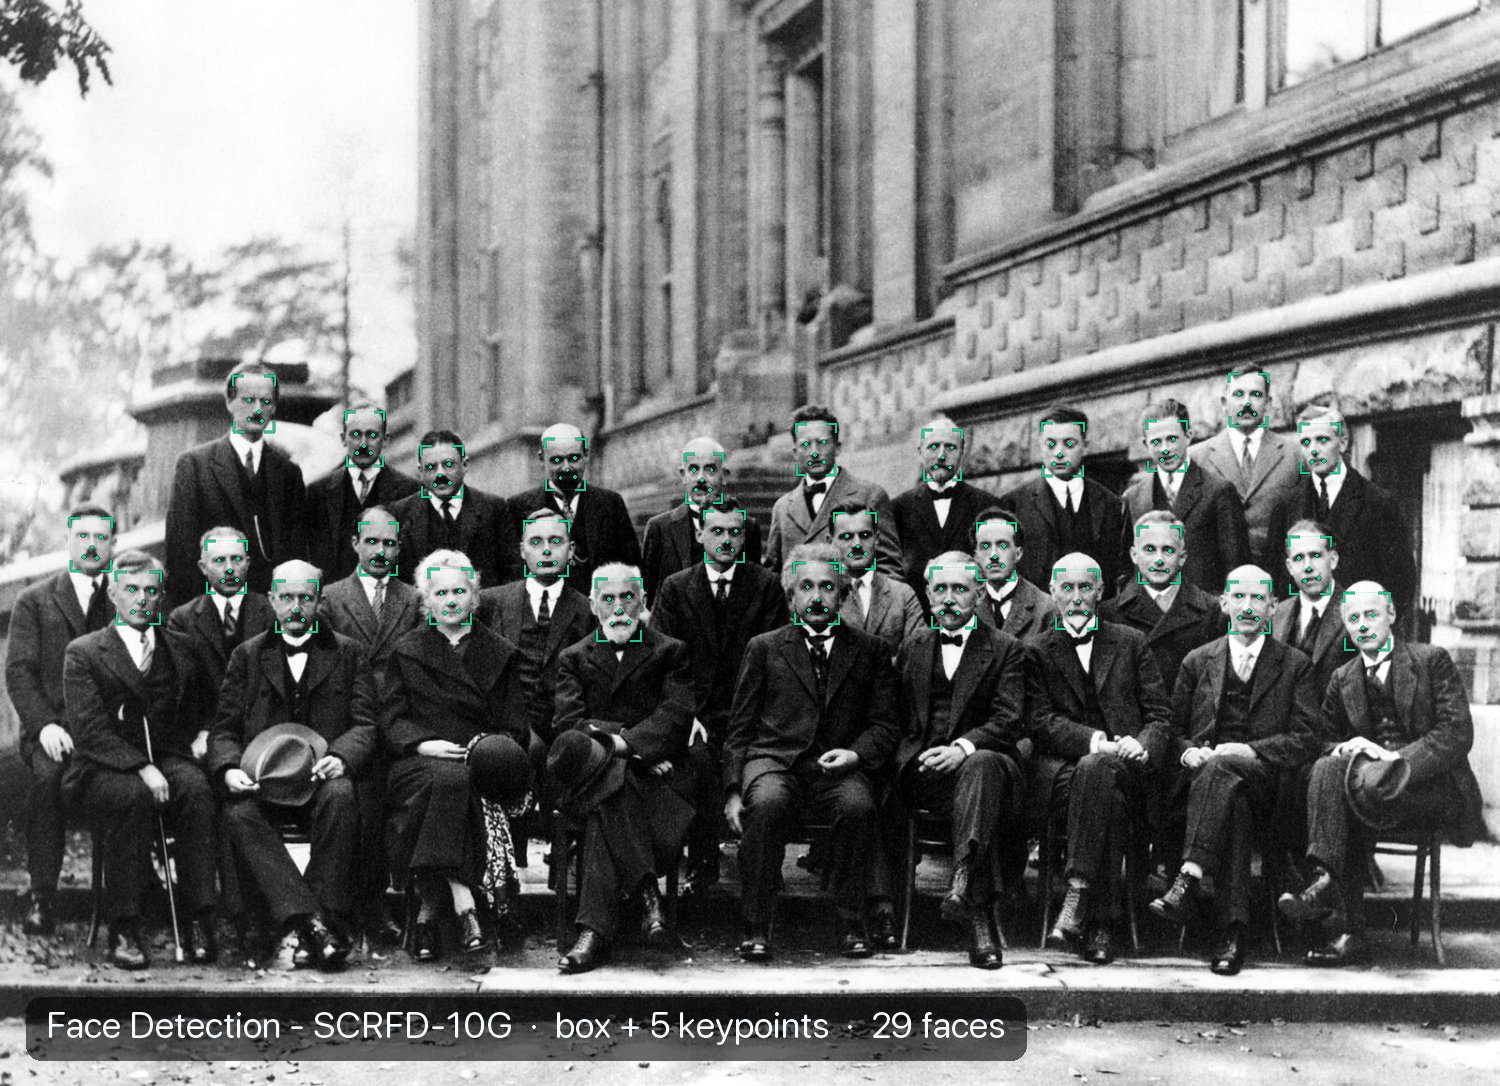
Every face in the photograph above is found, and the same 29 come back at the default
640×640 input_size, where the letterboxed faces are only about 18px across.
confidence_threshold=0.35 was used here, but the weakest of the 29 still scores 0.73.
Configuration
detector = SCRFD(
    model_name=SCRFDWeights.SCRFD_10G_KPS,
    confidence_threshold=0.5,
    nms_threshold=0.4,
    input_size=(640, 640),
    providers=None,  # Auto-detect, or ['CPUExecutionProvider']
)
CenterFace
Anchor-free detection that treats faces as center points (MobileNetV2 + FPN), with joint 5-point landmark prediction. Lightweight and fast on CPU.
Paper: CenterFace: Joint Face Detection and Alignment Using Face as Point
Basic Usage
| Variant | Size | Easy | Medium | Hard |
|---|---|---|---|---|
| DEFAULT | 7.0 MB | 92.2% | 91.1% | 78.2% |
Benchmark schema
Scores are WIDER FACE val with single inference on the original image (SIO). With multi-scale and flip testing the original repo reports 93.5% / 92.4% / 87.5%.
Limitations
- Landmark precision: landmarks are decoded from a single coarse feature-map cell per face, so they are less precise than SCRFD or RetinaFace (roughly 5% of box size deviation on upright faces). For alignment-critical recognition, prefer SCRFD/RetinaFace, or refine with PIPNet / Landmark106 on CenterFace boxes.
- Rotated faces: detection recall and landmark accuracy drop faster than SCRFD as in-plane rotation increases (noticeable beyond ~20-30 degrees). Best suited for roughly upright faces (webcams, portraits, surveillance).
Configuration
from uniface.constants import CenterFaceWeights

detector = CenterFace(
    model_name=CenterFaceWeights.DEFAULT,
    confidence_threshold=0.35,
    nms_threshold=0.3,
    input_size=(640, 640),  # width and height must be multiples of 32
    providers=None,         # Auto-detect, or ['CPUExecutionProvider']
)
YOLOv5-Face
YOLO-based detection optimized for faces.
Basic Usage
Model Variants
from uniface.detection import YOLOv5Face
from uniface.constants import YOLOv5FaceWeights

# Lightweight
detector = YOLOv5Face(model_name=YOLOv5FaceWeights.YOLOV5N)

# Balanced (default)
detector = YOLOv5Face(model_name=YOLOv5FaceWeights.YOLOV5S)

# High accuracy
detector = YOLOv5Face(model_name=YOLOv5FaceWeights.YOLOV5M)
| Variant | Size | Easy | Medium | Hard |
|---|---|---|---|---|
| YOLOV5N | 11 MB | 93.6% | 91.5% | 80.5% |
| YOLOV5S | 28 MB | 94.3% | 92.6% | 83.2% |
| YOLOV5M | 82 MB | 95.3% | 93.8% | 85.3% |
Fixed Input Size
YOLOv5-Face uses a fixed input size of 640×640.
Configuration
detector = YOLOv5Face(
    model_name=YOLOv5FaceWeights.YOLOV5S,
    confidence_threshold=0.6,
    nms_threshold=0.5,
    nms_mode='numpy',  # or 'torchvision' for faster NMS
    providers=None,    # Auto-detect, or ['CPUExecutionProvider']
)
YOLOv8-Face
Anchor-free detection with DFL (Distribution Focal Loss) for accurate bbox regression.
Basic Usage
Model Variants
from uniface.detection import YOLOv8Face
from uniface.constants import YOLOv8FaceWeights

# Lightweight
detector = YOLOv8Face(model_name=YOLOv8FaceWeights.YOLOV8_LITE_S)

# Recommended (default)
detector = YOLOv8Face(model_name=YOLOv8FaceWeights.YOLOV8N)
| Variant | Size | Easy | Medium | Hard |
|---|---|---|---|---|
| YOLOV8_LITE_S | 7.4 MB | 93.4% | 91.2% | 78.6% |
| YOLOV8N | 12 MB | 94.6% | 92.3% | 79.6% |
Fixed Input Size
YOLOv8-Face uses a fixed input size of 640×640.
Configuration
detector = YOLOv8Face(
    model_name=YOLOv8FaceWeights.YOLOV8N,
    confidence_threshold=0.5,
    nms_threshold=0.45,
    nms_mode='numpy',  # or 'torchvision' for faster NMS
    providers=None,    # Auto-detect, or ['CPUExecutionProvider']
)
BlazeFace
Google MediaPipe's short-range SSD detector, the one that runs ahead of Face Mesh in MediaPipe's own pipeline. Pair it with FaceMesh to reproduce that output exactly.
At 0.5 MB it is by far the smallest detector here, but it is tuned for faces within roughly 2 m and is less accurate than SCRFD or YOLOv8 on small or distant faces. Choose it for its footprint or for MediaPipe parity — not as a general-purpose detector.
Basic Usage
from uniface.detection import BlazeFace

detector = BlazeFace()
faces = detector.detect(image)

for face in faces:
    print(f"Confidence: {face.confidence:.2f}")
    print(f"Keypoints: {face.landmarks.shape}")  # (6, 2), not (5, 2)
Keypoint Layout
# [right_eye, left_eye, nose_tip, mouth_center, right_ear, left_ear]
# Named from the subject's perspective, so rows 0/1 are the viewer-left
# and viewer-right eye — the same geometric order the 5-point template uses.
Configuration
detector = BlazeFace(
    confidence_threshold=0.5,
    nms_threshold=0.3,   # MediaPipe blends overlapping boxes rather than dropping them
    providers=None,      # Auto-detect, or ['CPUExecutionProvider']
)
Available Detectors
Import the detector class you need:
from uniface.detection import BlazeFace, CenterFace, RetinaFace, SCRFD, YOLOv5Face, YOLOv8Face

detector = RetinaFace()
# or
detector = SCRFD()
# or
detector = CenterFace()
# or
detector = YOLOv5Face()
# or
detector = YOLOv8Face()
# or
detector = BlazeFace()   # 6 keypoints; supports_alignment is False
Output Format
All detectors return list[Face]:
for face in faces:
    # Bounding box [x1, y1, x2, y2]
    bbox = face.bbox

    # Detection confidence (0-1)
    confidence = face.confidence

    # Landmarks (K, 2)
    landmarks = face.landmarks
    # K == 5 for every detector except BlazeFace:
    #   [left_eye, right_eye, nose, left_mouth, right_mouth]
    # BlazeFace returns K == 6 in MediaPipe's own order; see the warning above.
Visualization
from uniface.draw import draw_detections

draw_detections(
    image=image,
    faces=faces,
    vis_threshold=0.6,
)

cv2.imwrite("result.jpg", image)
Performance Comparison
Benchmark on your hardware:
See Also
- Recognition Module - Extract embeddings from detected faces
- Landmarks Module - Get 106 / 98 / 68-point dense landmarks
- Image Pipeline Recipe - Complete detection workflow
- Concepts: Thresholds - Tuning detection parameters
- CLI Tools - Command-line scripts for all UniFace modules